A musty, damp smell you can’t quite place, floors that feel strangely cold in the winter, and higher-than-expected energy bills are common homeowner frustrations that, surprisingly often, originate right beneath your feet: the crawl space. For years, this part of the home was treated as an afterthought a dark, vented space for plumbing and wiring. We now understand that a neglected crawl space can have a major effect on your home’s health, your family’s comfort, and your monthly budget. The air in that space doesn’t stay put; it rises and circulates throughout your living areas, bringing with it moisture, allergens, and odors.
This guide is designed to be your definitive resource for understanding and fixing these issues. Drawing from years of hands-on experience transforming damp, inefficient crawl spaces into clean, dry, and conditioned environments, we have put together a complete overview. We’ll walk through everything from the fundamental science of how your crawl space interacts with your home to the specific, practical solutions that make a real difference.
Here, you will learn everything you need to know about creating a healthier home environment from the ground up. We will cover:
- The Science: An explanation of why your crawl space is so important and how it affects your entire home.
- The Problems: A detailed look at the core issues of moisture, pests, and energy loss.
- The Solutions: A complete breakdown of encapsulation, insulation, and air management.
- The Process: An overview of what to expect when implementing these solutions.
- The Benefits: A review of the tangible improvements you’ll see in air quality, energy savings, and home value.
By the end of this guide, you’ll have a clear understanding of how to turn one of your home’s biggest liabilities into a valuable asset.
Why Your Crawl Space Matters More Than You Think
Before we get into solutions, it’s important to understand why this seemingly insignificant area has such a big impact. Most homes are not airtight. Air moves freely through small cracks and openings, and a physical principle known as the “stack effect” is constantly at play.
The stack effect works like a chimney. As warm air rises in your home and escapes through the upper levels and attic, it creates a vacuum that pulls air up from the lowest point, which is the crawl space. In fact, a significant portion of the air you breathe on the first floor originates from down below. An analysis from the U.S. Environmental Protection Agency suggests that up to 40% of the air in a home can infiltrate from the crawl space or basement. When that crawl space is damp, moldy, or filled with pest droppings, that’s exactly what gets pulled into your living room, kitchen, and bedrooms.
This makes the condition of your crawl space directly linked to your home’s indoor air quality, structural integrity, and energy efficiency.
Vented vs. Unvented Crawl Spaces
Traditionally, crawl spaces were built with vents to the outside. The theory was that these vents would allow moisture to escape. Building science has since shown that this approach often causes more problems than it solves. In humid climates, these vents invite damp, warm air into the cool crawl space, where condensation forms on pipes, ductwork, and floor joists, creating a perfect environment for mold growth and wood rot. Modern building practices now favor creating a closed, unvented, and conditioned crawl space that becomes a clean and dry part of the home’s thermal envelope.
The Core Problems: Moisture, Pests, and Energy Waste
Nearly every crawl space issue can be traced back to one of three root causes. Understanding them is the first step toward finding the right solution.
1. Uncontrolled Moisture
Moisture is the primary enemy of a healthy crawl space. It can enter from several sources:
- Ground Evaporation: Water vapor naturally rises from the soil. A simple dirt floor offers no resistance.
- Outside Air: As mentioned, vents allow humid air to flow in freely.
- Water Intrusion: Poor exterior drainage, leaky pipes, or a high water table can lead to standing water.
This constant moisture creates a cascade of problems. It encourages mold and mildew growth, which can release spores into your home’s air supply. The Centers for Disease Control and Prevention notes that mold exposure can cause symptoms like a stuffy nose, wheezing, and red or itchy eyes. For people with asthma or mold allergies, the effects can be more intense. Beyond health concerns, persistent dampness can cause wood rot in your floor joists and beams, potentially leading to serious structural damage over time.
2. Unwanted Pests
A dark, damp, and cluttered crawl space is an open invitation for pests. Termites, carpenter ants, rodents, and other insects thrive in these conditions. They are not only a nuisance but can also cause significant damage to your home’s wooden structures. A dirt floor is easy for them to burrow into, and high moisture levels provide the water they need to survive. Sealing and drying out the crawl space makes it a far less hospitable environment for these unwelcome guests.
3. Wasted Energy
If your crawl space is uninsulated and vented, your home is losing a surprising amount of energy. In the winter, cold air floods the space, making the floors above it frigid. Your heating system has to work much harder to keep the house warm. In the summer, hot, humid air makes your air conditioner run overtime. According to the U.S. Department of Energy, insulating the crawl space can lead to significant energy savings, as it helps stabilize the temperature of the entire home.
The Complete Solution: Encapsulation, Insulation, and Dehumidification
Fixing a crawl space isn’t about a single product; it’s about creating a system that controls moisture, air, and temperature. The three main parts of this system are encapsulation, insulation, and dehumidification.
Step 1: Encapsulation (The Vapor Barrier)
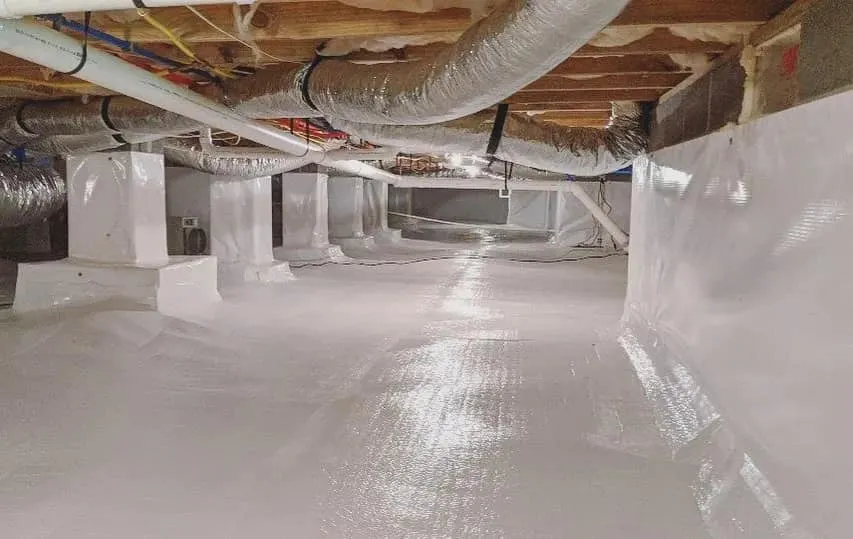
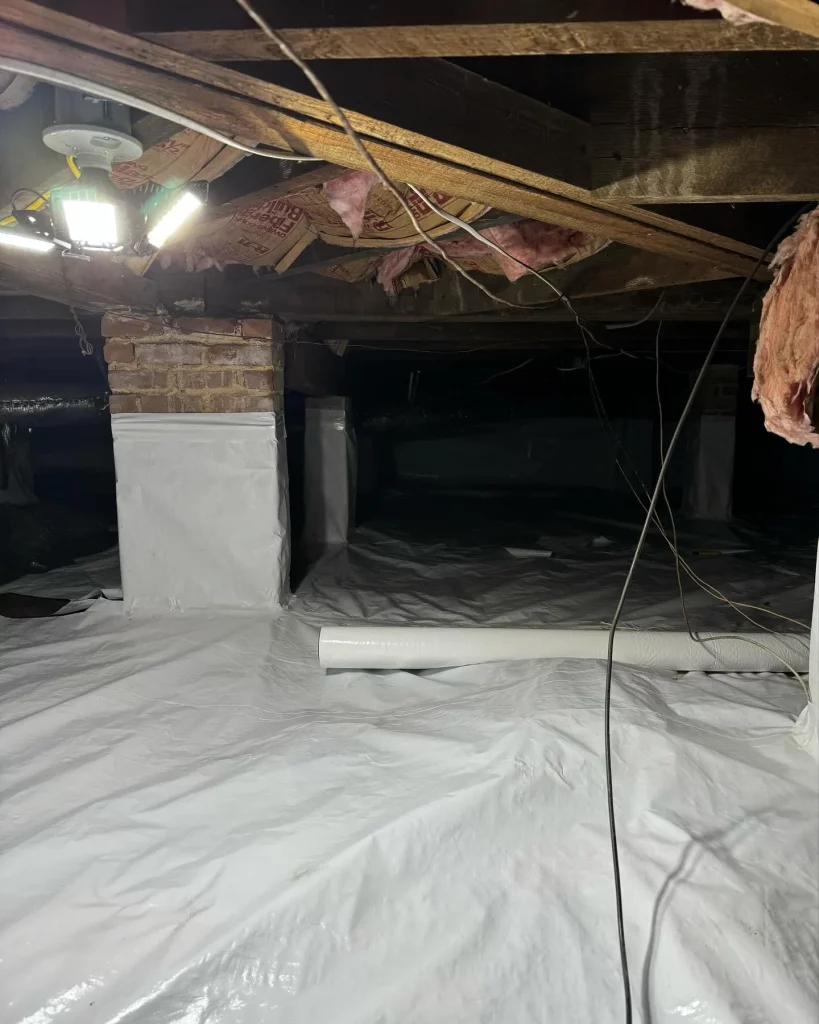
Crawl space encapsulation is the process of completely sealing the area from the earth and the outside air. This is done by laying down a thick, durable plastic liner, known as a vapor barrier, across the entire floor and up the walls.
The process typically involves:
- Cleaning and Preparation: Removing all debris, old insulation, and any sharp objects from the crawl space. If there’s standing water, it must be addressed with a proper drainage system first.
- Sealing Vents and Openings: All outside vents and any cracks or holes in the foundation walls are sealed airtight to prevent air and moisture intrusion.
- Laying the Vapor Barrier: A heavy-duty liner (typically 12-20 mil thick) is installed over the entire dirt floor.
- Securing and Sealing: The liner is run up the foundation walls and attached mechanically. All seams between sheets of the liner are overlapped and sealed with special waterproof tape to create a continuous, impenetrable barrier.
This barrier stops moisture vapor from the ground from ever entering the crawl space, which is the single most important step in drying out the environment.
Expert Tip: Don’t settle for a thin, cheap plastic sheet from a hardware store. A proper crawl space vapor barrier is a puncture-resistant, multi-layered polyethylene material designed specifically for this purpose. Anything less than 10-mil thickness will likely fail over time.
Step 2: Insulation
Once the crawl space is sealed, the next step is to insulate it properly. This brings the space inside your home’s thermal boundary, which helps maintain a stable temperature and reduces energy consumption. Instead of insulating the floor joists (the “ceiling” of the crawl space), the modern approach is to insulate the foundation walls. This makes the crawl space a conditioned area, which protects pipes from freezing and keeps ductwork in a temperature-controlled environment.
Here’s a comparison of the two best insulation materials for crawl space walls:
| Feature | Closed-Cell Spray Foam | Rigid Foam Board |
|---|---|---|
| R-Value | High (R-6 to R-7 per inch) | Good (R-4 to R-5 per inch) |
| Air Sealing | Excellent. Creates a perfect air seal. | Good, but seams must be taped. |
| Moisture Barrier | Acts as its own moisture barrier. | Vapor retarder, but not a true barrier. |
| Application | Sprayed on, fills all gaps and cracks. | Cut to fit and mechanically fastened. |
| Pest Resistance | Inert material that does not attract pests. | Can be burrowed into by some insects. |
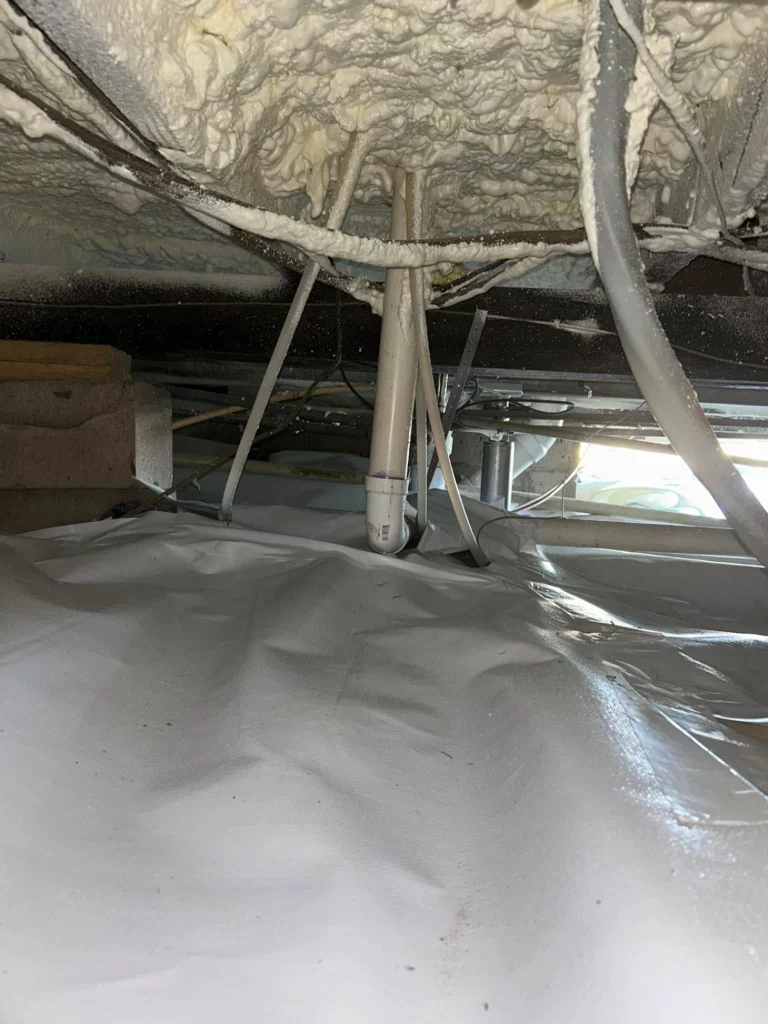
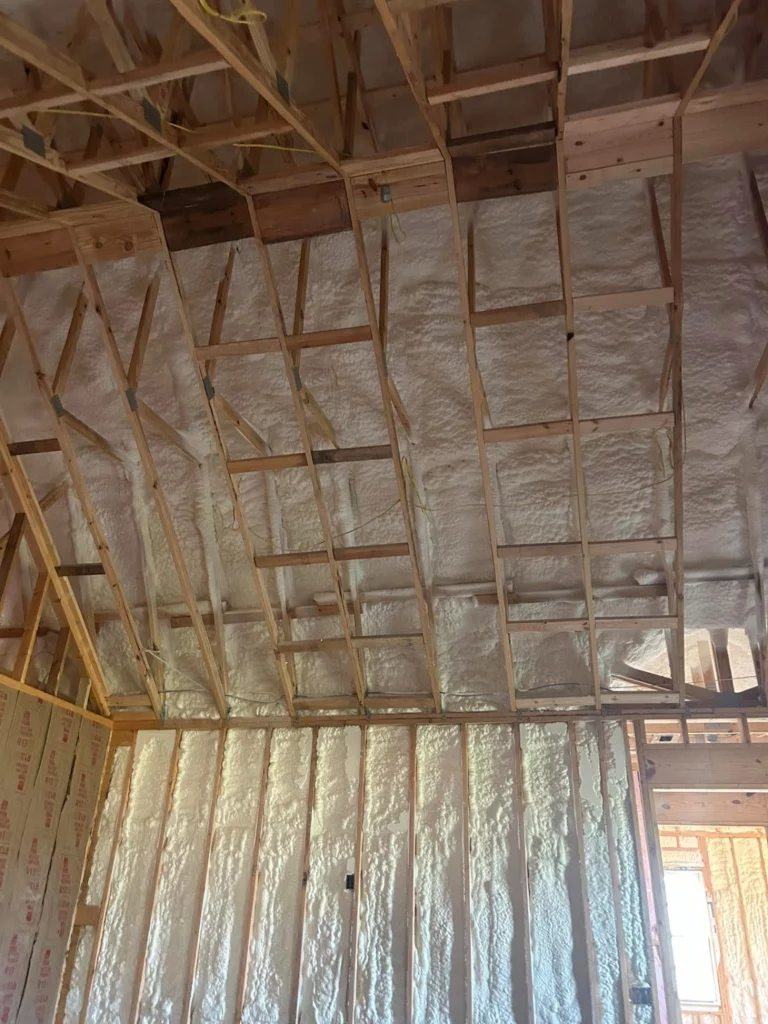
While rigid foam is a viable option, closed-cell spray foam provides a superior, seamless solution because it acts as an insulator, air sealant, and moisture barrier all in one application. It perfectly adheres to any surface, leaving no gaps for air or moisture to penetrate.
Step 3: Dehumidification
The final piece of the puzzle is mechanical drying. Even with a perfect encapsulation, some moisture can still enter the space when the access door is opened. A high-quality, commercial-grade dehumidifier is essential for maintaining the ideal relative humidity level (typically between 30% and 50%).
A crawl space dehumidifier is different from a standard household unit. It’s more durable, designed to operate in lower temperatures, and equipped with an automatic drainage hose so you never have to empty a bucket. It constantly monitors the air and kicks on only when needed to keep the environment stable and dry, preventing any possibility of mold growth.
Expert Tip: Proper dehumidifier placement is key. It should be located in a central area to promote good air circulation throughout the entire crawl space. Setting the unit on raised blocks will protect it in the unlikely event of a plumbing leak.
The Long-Term Benefits of a Healthy Crawl Space
Investing in your crawl space is really an investment in your entire home. The positive effects are widespread and long-lasting.
- Better Indoor Air Quality: With mold, mildew, and dust mites eliminated at the source, your family will breathe cleaner, healthier air. This is especially noticeable for those with allergies or asthma.
- Significant Energy Savings: By creating a conditioned space beneath your home, you reduce the workload on your HVAC system. Many homeowners see a noticeable drop in their heating and cooling bills after completing the project.
- Enhanced Comfort: No more cold floors in the winter. The temperature throughout your home will be more consistent and comfortable.
- Structural Preservation: By keeping the wooden foundation of your home dry, you protect it from wood rot and termite damage, preserving its structural integrity for decades to come.
- Valuable Storage Space: A clean, dry, and encapsulated crawl space can be used as a safe storage area, freeing up space in your garage or basement.
Putting Your Crawl Space Strategy into Action
Your crawl space is the foundation of your home’s health. Ignoring it means allowing moisture, allergens, and inefficient air to circulate freely through your living space. By taking a systematic approach of controlling water, sealing out external air, and managing humidity, you can permanently solve these problems. A complete system of encapsulation, insulation, and dehumidification works together to create a dry, clean, and efficient foundation for your entire house.
The benefits go far beyond just fixing a damp space. You’re investing in better air quality for your family, lower energy bills for your wallet, and long-term protection for your home’s structure. This guide should serve as your reference as you consider the best path forward for making your home safer and more comfortable from the ground up.
Need Expert Guidance?
Understanding the science behind crawl space solutions is the first step, but a successful project depends on proper execution. If you have questions about your specific situation or would like a professional assessment of your crawl space, the team at Premier Insulation GA is here to help. With years of experience in creating healthy, efficient homes, we can provide a clear plan to address your needs. For a consultation, you can reach us at (229) 554-3939.
Sources
- U.S. Environmental Protection Agency – This resource provides an explanation of the stack effect and its impact on indoor air quality.
- Centers for Disease Control and Prevention – This page contains information on the health effects of indoor mold exposure.
- U.S. Department of Energy – This site offers guidelines and statistics on home insulation and energy savings.
Frequently Asked Questions About Crawl Space Solutions
Can I just put down a plastic sheet myself?
While a DIY approach might seem tempting, a professional installation ensures all the critical details are handled correctly. This includes properly cleaning the area, sealing all air leaks and vents, using a high-quality and appropriately thick vapor barrier, and perfectly taping all seams. A small mistake can compromise the entire system, allowing moisture and soil gases to bypass the barrier.
Is crawl space encapsulation expensive?
The cost can vary depending on the size and condition of your crawl space. However, it’s best viewed as an investment rather than an expense. The money you save on energy bills, combined with the prevention of costly structural repairs or mold remediation down the road, often provides a strong return.
How long does encapsulation last?
A professionally installed system using high-quality materials should last for the life of your home. The vapor barriers are extremely durable and designed to withstand service traffic.
Will I still need a dehumidifier if my crawl space is encapsulated?
Yes, a dehumidifier is strongly recommended. Encapsulation stops moisture from the ground and outside, but it doesn’t remove any existing humidity in the air or moisture that might enter through the access door. A dehumidifier is what actively controls the relative humidity and guarantees a dry environment.
Do I need to remove my old fiberglass insulation from the floor joists?
In most cases, yes. Old fiberglass insulation in a damp crawl space often becomes a trap for moisture, dirt, and mold. It loses its R-value when wet and can contribute to poor air quality. The modern approach is to remove it and insulate the foundation walls instead.

